If you’ve never tried exfoliating your skin, it’s definitely worth considering—this simple step can make a big difference in keeping your skin fresh, youthful, and glowing. Exfoliation removes the layer of dead skin cells that collect on the surface, which can otherwise leave your skin looking dull and aged. By including exfoliation in your routine, you can reveal smoother, more radiant skin.
To maintain that youthful glow, aim to exfoliate just 1-2 times per week—no need to overdo it! Below is an easy, step-by-step guide to help you make exfoliation a part of your regular skincare routine.
### What You’ll Need for Exfoliating Your Skin:
Here’s a quick list of essentials you’ll need to get started:
– **Loofah, exfoliating gloves, or a body brush**
– **Exfoliating cleanser**
– **Pumice stone** (for rough areas like feet)
– **Body lotion or moisturizer**
—
### How to Exfoliate: Step-by-Step Guide
#### **Step 1: Cleanse Your Skin**
Before exfoliating, start by washing your skin to remove dirt, oils, and makeup. Exfoliation is much more effective on clean skin. If you’re cleansing your face, choose a product that suits your skin type.
– For **dry skin**, go for a creamy cleanser with added moisture.
– For **oily skin**, opt for a clear gel cleanser.
You don’t have to break the bank—good cleansers can be found for under $20. Just be sure not to over-cleanse, as this can strip away vital nutrients from your skin. A nighttime cleanse to remove makeup, sunscreen, or any buildup from the day is usually sufficient for keeping your skin healthy.
—
#### **Step 2: Take a Shower**
It’s up to you whether you shower before or after cleaning your face, but using warm or hot water is ideal. The steam opens up your pores, making it easier to remove dirt, oil, and dead skin during exfoliation.
—
#### **Step 3: Target Rough Areas**
If you have rough patches or calluses, use a pumice stone to smooth them out. For stubborn spots, soak the area in a mix of warm water and milk for about 30 minutes before your shower. This will help soften tough skin, making it easier to exfoliate.
—
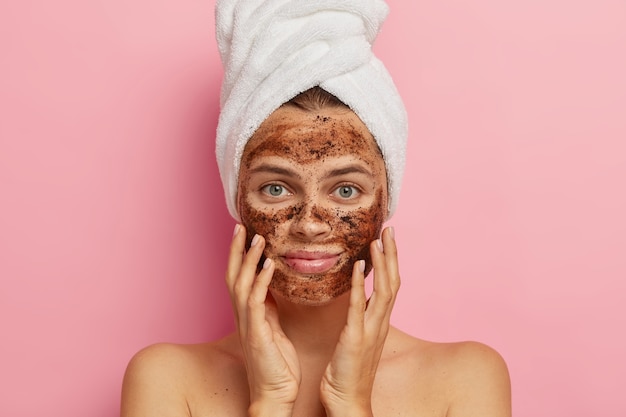
#### **Step 4: Exfoliate Your Skin**
Now comes the fun part! Apply your exfoliating cleanser to a loofah, exfoliating gloves, or body brush. Start at your feet and work your way up, gently scrubbing your skin in circular motions. Be cautious around sensitive areas, such as the skin near your bikini area—don’t scrub too hard there.
For hard-to-reach spots, like your back, a body brush can come in handy. When exfoliating your face, use a product specially designed for facial skin. These are much gentler than body scrubs and won’t irritate sensitive areas. Avoid your eyes and mouth when working on your face.
Don’t forget to exfoliate your hands! Our hands do so much daily, and giving them some extra care can help them stay soft and youthful-looking.
—
#### **Step 5: Rinse**
Once you’re done exfoliating, rinse your skin thoroughly with warm water. Then, finish with the coldest water you can tolerate—this helps close your pores, keeping them protected from dirt and other particles in the air.
—
#### **Step 6: Moisturize**
After rinsing, it’s time to lock in the moisture. Apply a body lotion or moisturizer while your skin is still damp—it will absorb better this way. Exfoliation can sometimes leave your skin feeling a bit dry, so moisturizing immediately afterward is essential to keep it hydrated and feeling soft.
—
### A Final Tip:
Having the right tools and products can make all the difference when it comes to achieving beautiful, glowing skin. Invest in a quality exfoliator and a natural, nourishing moisturizer to ensure your routine is as effective as possible.
By following these steps regularly—just once or twice a week—you’ll be on your way to having smooth, radiant skin that feels as good as it looks!